Introducing Tiny Finch's dashboard
Dashboard is your starting point in Tiny Finch . Once you log in with your email or Slack account, you’ll land directly on the dashboard.
Basically, the dashboard is your control panel for getting the chat live and customizing the chat widget. That's it. However, the dashboard does not give you access to handle conversation. All conversation handling happens inside the messenger app of your choice: WhatsApp, Telegram, or Slack.
Two things you have to pay attention to on the dashboard screen are the sidebar on the left and the chat widget at the bottom right.
In this article, we’ll uncover the functions of all buttons on the sidebar. And regarding the chat widget, treat it as a preview widget. We’ll see its preview function on the dashboard when we cover the Widget button below.
The left sidebar is where your main buttons are located. It contains six buttons: (1) Home for setup, simple stats, and pro tips for users; (2) Widget for customizing the chat widget; (3) Helpdesk for support content; (4) js API for advanced integrations; (5) Team for managing your team members; and (6) My account and subscription for managing your account and subscription. We’ll go through each of them.
Home
In Home, you’ll find your script tag. This tag contains a line of code that you have to copy and paste on your site so that the Tiny Finch chat widget goes live on your website.
You’ll also see your chat’s statistics: how many chats you’ve received, how many messages you’ve replied to, and how many conversations you’ve marked as resolved.
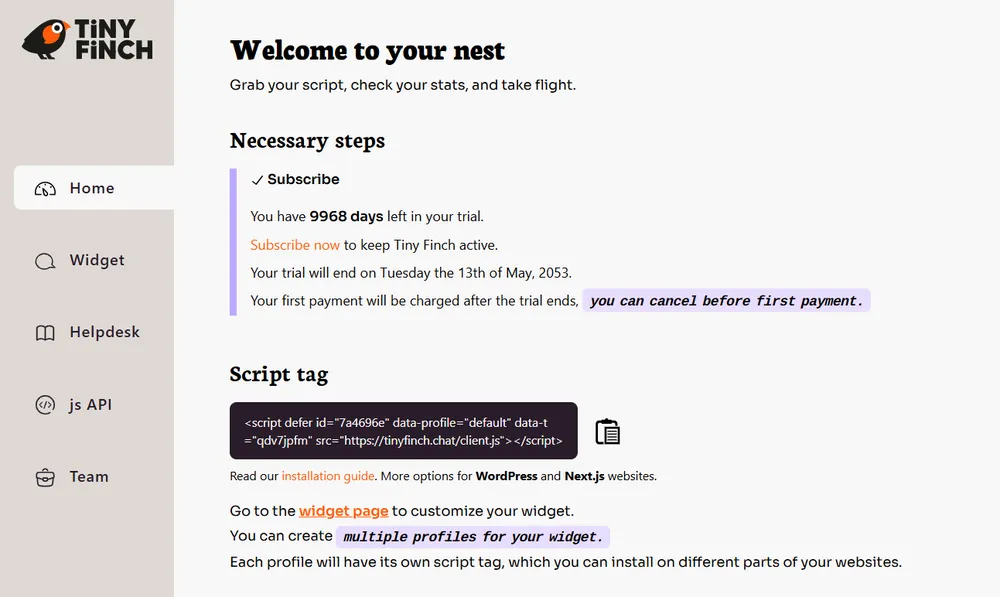
Under the pro tips for users, you’ll see that Tiny Finch uses simple emoji signals inside to manage conversations. They are divided into two categories: action and status emojis. Use action emojis to mark the conversation. Status emojis automatically appear in the conversation. Pay close attention to the use of emojis to improve your workflow.
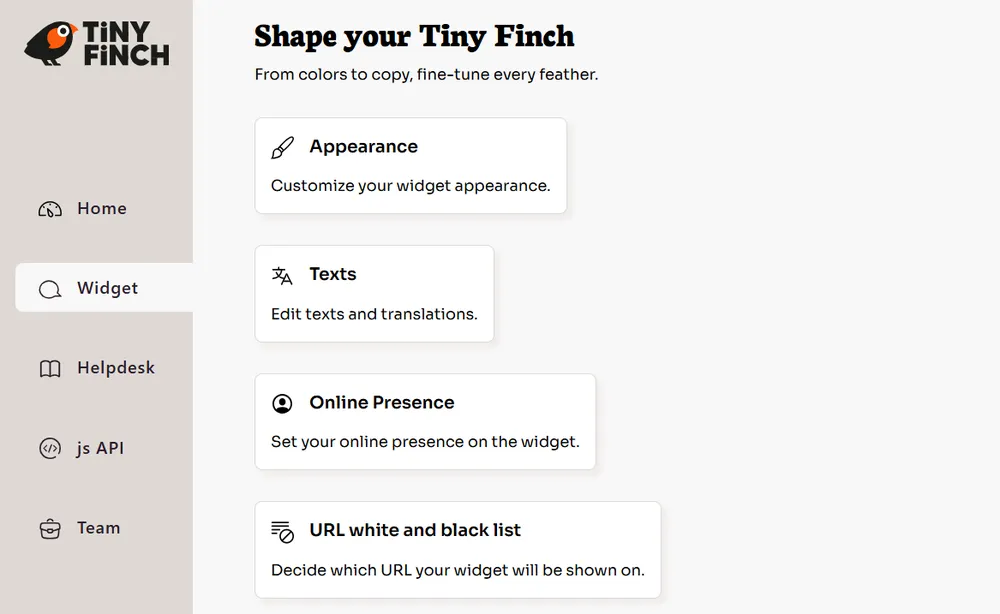
Widget
This is the place where you go to adjust the live chat’s properties, like appearance, text, and presence according to your brand identities.
Once you click the Widget button on the sidebar, you’ll see five buttons on the center of the page, each leading to a different subpage: (1) Appearance to manage the color, size, and icon of the widget; (2) Texts to edit the automatic messages and add translations; (3) Online presence to set the behavior of your live chat that users can see when it’s online, like showing the operator profile or not; (4) URL white and black list to manage which pages on your website you want your widget will or will not be shown on; and (5) Automatic interactions to set the automatic bot messages.
Every change you made on those five subpages is reflected directly on the chat widget on the bottom right of the page. So, make sure you check the widget if the change works. It functions as the preview of your widget. And, if you have already started a test conversation, reload the widget by clicking on "clear chat" to start a new conversation and see the new settings.
What if I want the widget to behave differently on different pages? Then you must create different profiles for different behaviors. By default, you have one profile. But once you have created more profiles, you’ll see them every time you click the Widget button. Each profile will contain five subpages mentioned above where you can establish the behavior of each profile.
Helpdesk
Dealing with customers means dealing with repetitive questions. Tiny Finch allows you to gather all frequently asked questions (FAQ) directly on the widget, and the Helpdesk button is where you put all your answers to the repetitive questions in the form of help articles.
Click the “Create an article” button that appears once you land on the Helpdesk page. It will lead you to a page to write your help article. Click “save” once you finish the help article.

To see the help articles on the widget, click the live chat on the bottom right of the page. The chat widget will expand. On top of the widget, you’ll see the Help button. Click on it, your help articles nest there. Click on any articles there, the article’s text will open directly on the widget.
Imagine your customers get their answers from the help articles without the need of chatting with you. You’ll get more time to focus on answering complex questions, but still solve simple questions.
js API
If you’re familiar with JavaScript, this function is best suited. Due to its complexity, we cover this matter in a separate article.
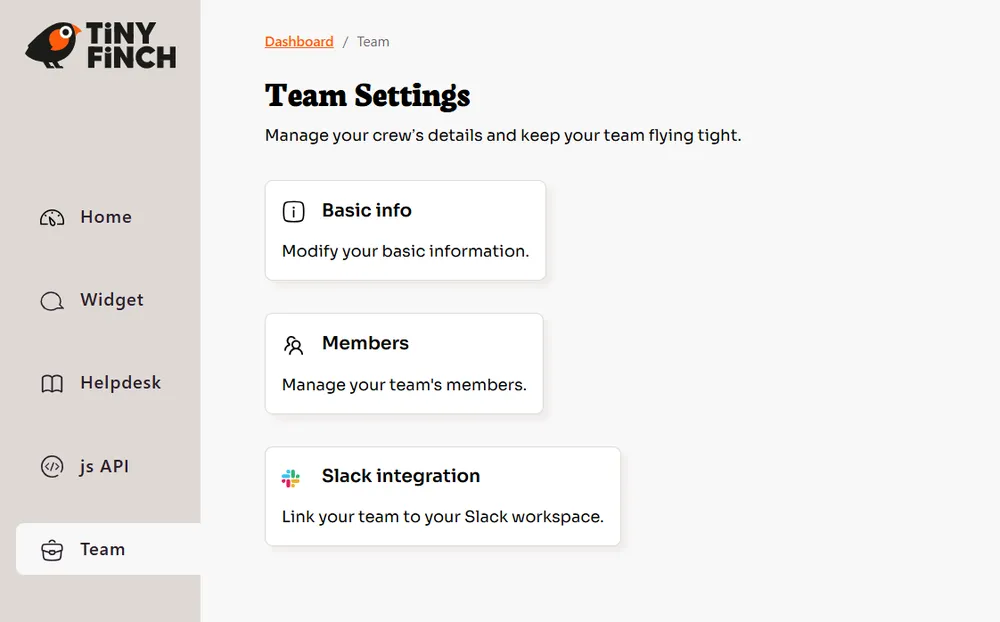
Team
You will see two buttons regarding this function: Basic info and Members. The former will show your team’s ID, name, and logo. You can edit everything, except for the ID, which is auto-generated. The latter allows you to invite new personnel by email to the team.
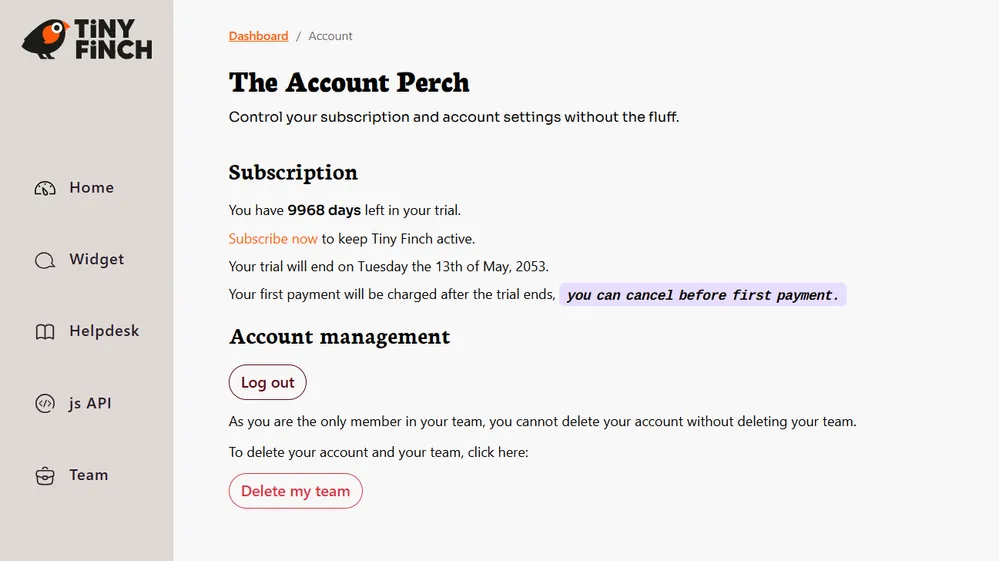
My account and subscription
The last function on the sidebar is about your account management. You can see your subscription there, account management in case you need to log out or delete your account. Tiny Finch also allows you to delete your account easily and won’t hold your data!
So, that's my guide to Tiny Finch’s dashboard. I hope it satisfies your curiosities. If not, well, chat with me through the widget !