Install Tiny Finch on WordPress with our plugin
The Tiny Finch WordPress plugin is the easiest way to add the Tiny Finch live chat widget to your WordPress website, without writing any code, touching <script> tags, or guessing how things work.
It’s designed for WordPress admins who prefer using plugins over dealing with HTML tags.
What the plugin does
Normally, installing Tiny Finch requires adding a <script> tag to your site’s HTML. If that sentence already made you sigh, this plugin is for you.
With the plugin, you install Tiny Finch like any other WordPress plugin: then, in the plugin settings you enter your Tiny Finch credentials once and the live chat widget appears automatically on your site.
Step-by-step installation
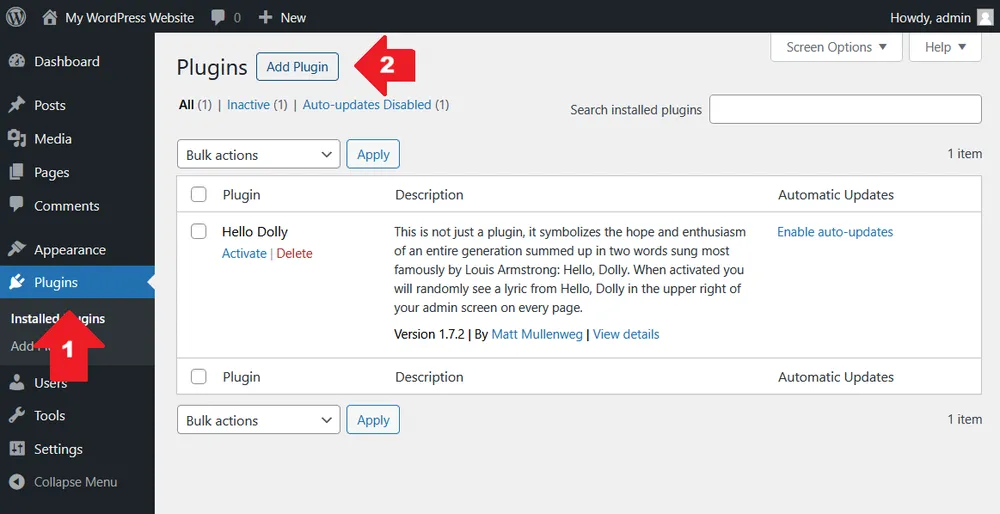
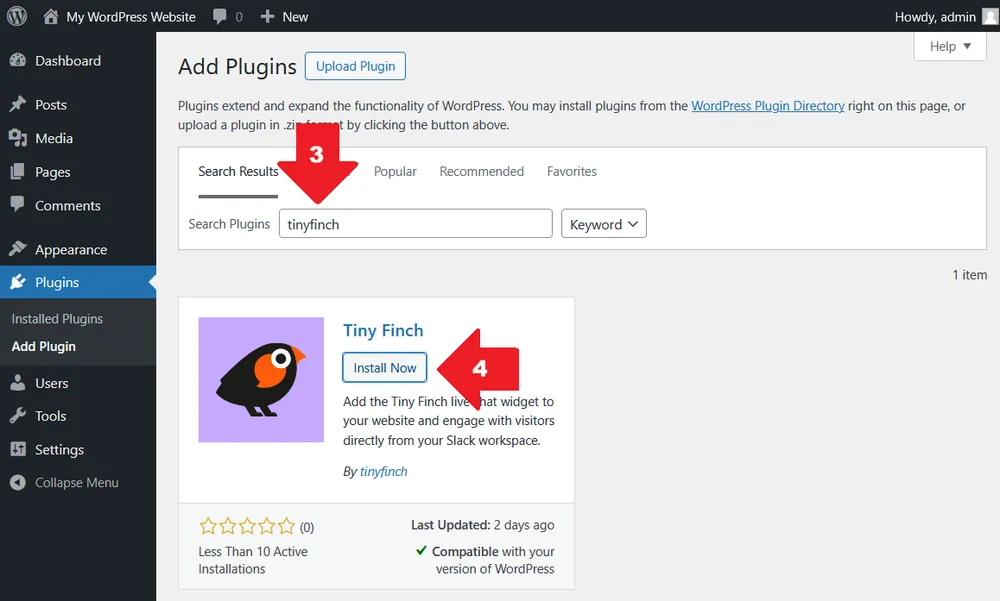
1. Install the plugin
-
Go to your WordPress admin dashboard
-
Open Plugins → Add Plugin (also see the screenshots below; follow the red arrows in order)
-
Search for tinyfinch
-
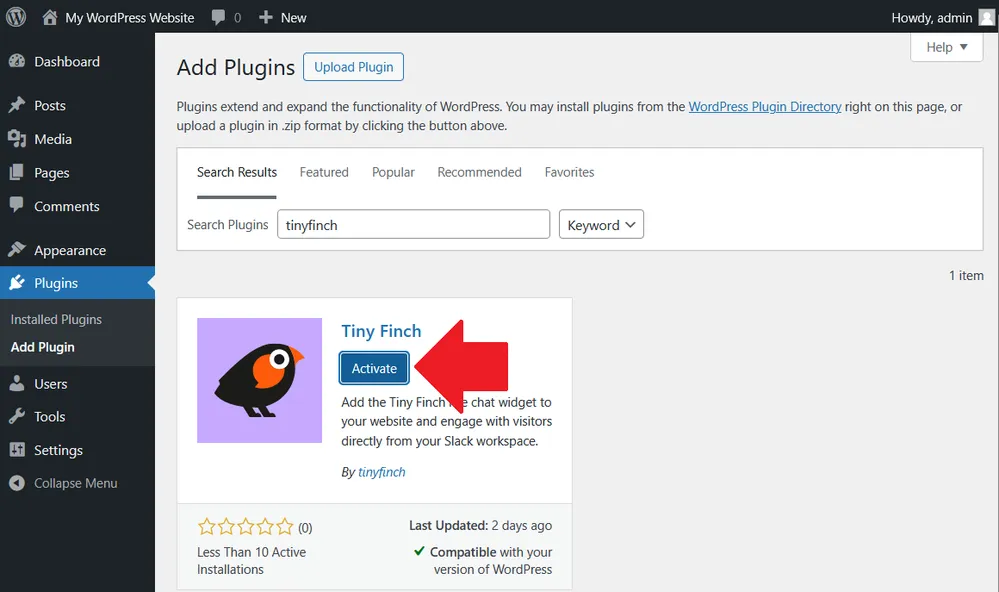
Click Install Now, then Activate
Once activated, Tiny Finch will appear in your plugin list.
2. Open the plugin configuration
After activation, go to Settings → Tiny Finch Settings (or click Settings directly from the plugin list). You’ll see a simple configuration form with two fields.

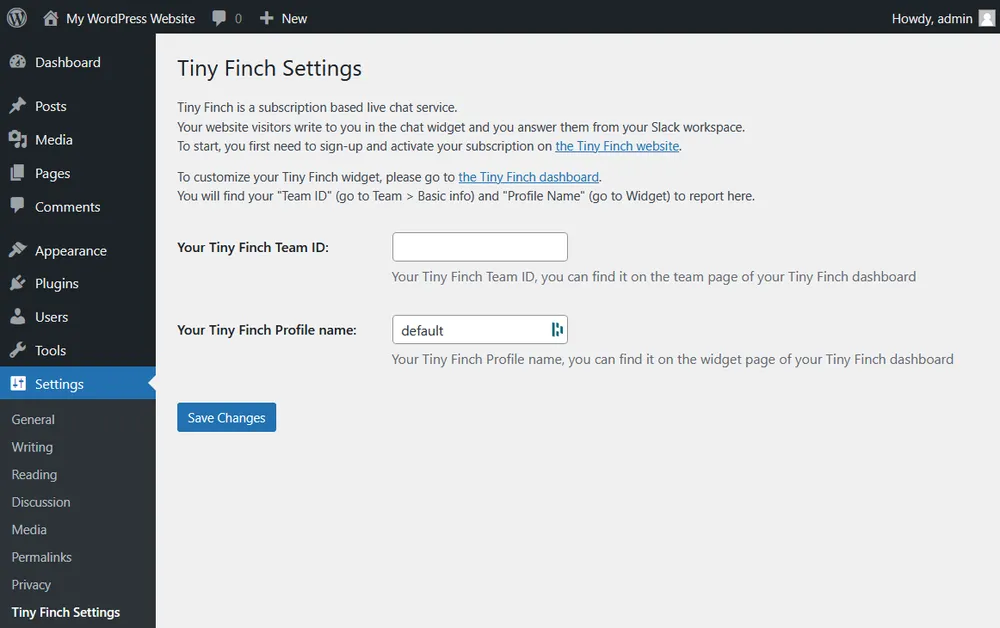
3. Fill in the required fields
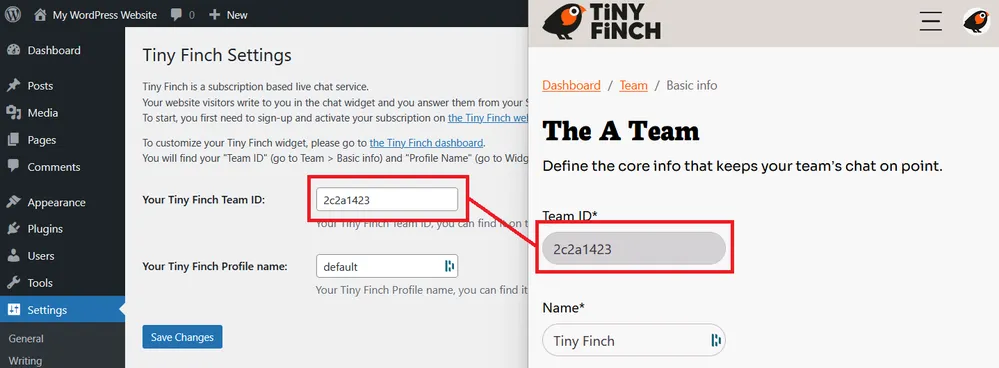
Team ID (required)
-
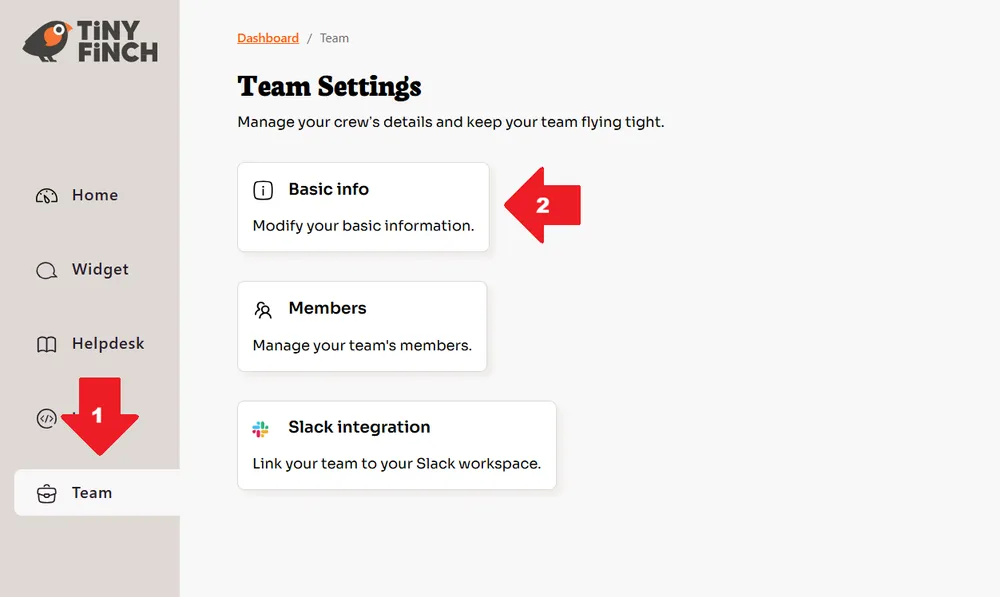
This is your Team ID from the Tiny Finch dashboard (open Team → Basic info)
-
You can find it in your Tiny Finch account settings
-
Copy and paste it into the field
Profile name (optional)
-
Only needed if your Tiny Finch account has multiple profiles
-
Use it to select which profile should be linked to this website
-
If you have only one profile, you can leave this field set to default
4. Save the configuration
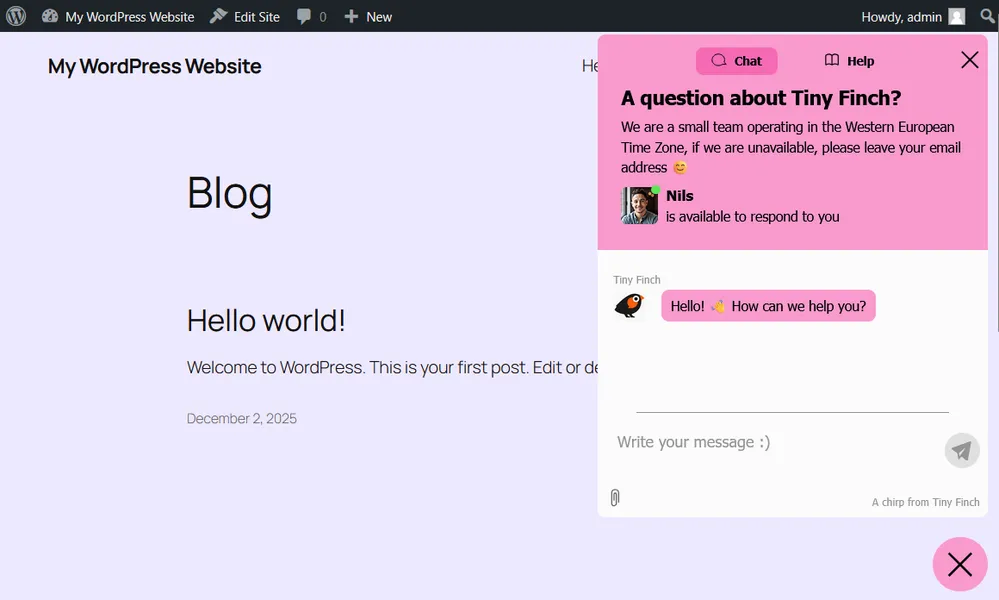
Click Save. As soon as the form is saved, the Tiny Finch live chat widget will appear on your website at the bottom right.
Customizing the widget
The WordPress plugin handles installation only. All customization happens in the Tiny Finch dashboard.
From the dashboard, you can:
-
Choose which pages show or hide the widget (page-level control is one of the most commonly used features, for example: hide it on checkout or legal pages)
-
Adjust widget behavior and appearance
-
Manage conversations and team settings
If you can install a WordPress plugin, you can install Tiny Finch. And if you ever wondered why a chat widget required editing HTML in 2026, congratulations! You no longer have to on WordPress.
For everything else, head to the Tiny Finch dashboard and make it yours.